Setting Up Your Home Studio :: A Practical Guide
Setting Up Your Home Studio: A Practical Guide
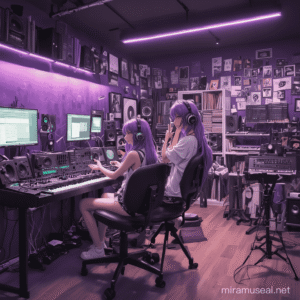
Creating a home studio is not just about having the right equipment; it’s also an art of balancing acoustics, ergonomic design, and personal workflow. This practical guide will walk you through setting up your own space where creativity can flourish without leaving your comfort zone.
Understanding Your Space: The Foundation of a Home Studio
Before diving into equipment purchases or layout designs, assess the room that’ll serve as your studio. Consider size and shape—larger spaces offer more flexibility but come with higher costs for soundproofing if necessary. Remember to account for power outlets; you’ll need them not just for monitors and mixers but also microphones (some require phantom power), preamps, audio interfaces, computers, speakers, headphones, lighting equipment, etc.
Acoustics: Controlling Sound in Your Studio Space
Soundproofing is crucial to prevent sound from escaping and disturbing others or picking up unwanted noise. Acoustic foam panels can be used on walls and ceilings for absorption of excess echoes, while bass traps are essential at the corners where low frequencies tend to accumulate. Additionally, consider a carpeted floor if you’re in an area with hard surfaces that reflect sound.
Ergonomics: Designing Your Workspace For Comfort and Efficiency
Your studio should be comfortable for long hours of work without causing strain or injury. An adjustable chair is key, as it supports your posture while you’re sitting down to record or mix audio/video content. The monitor height should allow the screen line-up with eye level when seated; if not possible due to space constraints, consider a riser and an arm for additional support.
Selecting Your Equipment: Finding Balance Between Quality And Budget
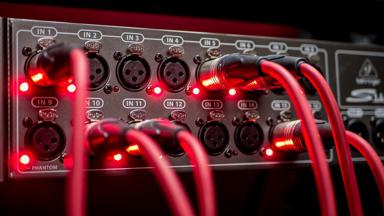
Invest in good quality microphones that suit your recording needs—dynamic mics are great for live sound capture while condenser mics excel at capturing studio-quality recordings with detail and sensitivity. For audio interfaces, look beyond the price tag; consider factors like preamp quality (which can significantly impact recorded sound), number of inputs/outputs needed, connectivity options, and additional features such as direct monitoring or headphone outputs for critical listening while recording.
Monitors: The Window to Your Sound Quality
High-quality studio monitors are non-negotiable in a home setup—they allow you to hear your recordings accurately without coloration of sound that can distort the mix quality. Investing in at least two (for stereo panning) is recommended, with consideration for additional ones if space and budget permit. Monitors should be placed strategically around the room; typically an equilateral triangle between you, your monitors, and a mixing board or audio interface works best to ensure even sound coverage in all directions.
Mixing Desk:
The Heart of Your Studio Setup keyspace_start For those who prefer recording with headphones on (to avoid feedback), an isolation booth can be beneficial, but if you’re planning for mixing and monitoring your recordings as well, a good quality mixer is essential. Look for one that suits the number of inputs/outputs required by your setup while also offering features like EQ controls, panning knobs, auxiliary sends (for effects), and direct monitor outputs if available on your audio interface or monitors.
Recording Software: Choosing Your Digital Toolkit
Whether you’re a producer looking to record multiple tracks simultaneously or an engineer mixing multi-tracked music pieces, having reliable recording software is crucial. There are many options ranging from free DAWs (Digital Audio Workstations) like Audacity for beginners and basic needs, all the way up to professional suites such as Pro Tools by Avid Technology that offer advanced features tailored towards studio-level production work.
Power Management: Keeping Your Studio Running Smoothly
Ensure your power outlets are sufficient not just for monitors but also for any additional equipment like lighting or external gear you might use in the future. Consider a Uninterruptible Power Supply (UPS) to protect against sudden shutdowns and potential data loss, especially if dealing with expensive recording devices that require stable power supply.
Organization: Maintaining Order for Creative Flow
A cluttered studio can lead to mental blocks or inefficiency during creative processes. Investing time into organizing cables (using cable ties and management systems), keeping your equipment clean, labelling gear when necessary, and having a designated place for everything will save you from unnecessary stress down the line.
Lighting: Setting The Mood And Ensuring Visibility
Proper lighting can enhance mood while also serving practical purposes like ensuring visibility of your workspace during late-night sessions or when dealing with detailed equipment setups and adjustments. LED panels are energy efficient, versatile for color temperature control (from warm to cool white), and provide bright yet diffused illumination that’s ideal for a studio environment without causing glare on screens or monitors.
Networking: Connectivity For Seamless Operation And Collaboration
In today’s digital age, having reliable internet connectivity is as important in your home studio setup as any piece of hardware you might have. A stable and fast connection ensures smooth operation when transferring files between devices or collaborating with others online for music production projects without lagging or interruptions.
Testing And Tweaking: The Final Touches To Your Studio Setup
Once everything is set up, spend time testing your equipment to ensure they’re functioning as expected and tweak the setup if necessary—adjust monitor positions for optimal sound coverage, reposition microphones or monitors based on recording needs. This phase also includes setting up a backup system (external hard drives) for safeguarding against data loss due to hardware failure.
Building a hybrid music studio involves blending analogue hardware with digital software to create a versatile and high-quality recording and production environment. Here are the steps to consider when setting up a hybrid music studio:
-
Define your goals and needs: Determine the type of music production you will be doing, the equipment you need, and your budget constraints. Decide whether you want to focus more on analogue gear for warmth and character or digital tools for flexibility and convenience.
-
Select your recording equipment:
- Choose a high-quality audio interface with enough inputs and outputs to accommodate your hardware and software requirements.
- Invest in microphones, preamps, and outboard gear to capture and process audio signals with professional quality.
- Consider adding analogue synthesizers, drum machines, effects processors, and other hardware units to enhance your sound palette.
-
Set up your digital audio workstation (DAW):
- Install a suitable DAW software platform that is compatible with your hardware and workflow preferences.
- Integrate virtual instruments, samplers, and software effects plugins with your DAW to expand your sonic possibilities and creative options.
-
Connect and route your gear:
- Create a signal flow diagram to map out how your hardware units, instruments, and software are connected to your audio interface and DAW.
- Use patchbays, audio routers, and interface routing software to manage signal routing, switching, and processing between analogue and digital devices.
-
Learn to use your equipment:
- Familiarize yourself with the features, functions, and capabilities of your analogue hardware, software plugins, virtual instruments, and DAW.
- Experiment with different recording techniques, signal chains, and processing options to explore creative ways to blend analogue and digital elements in your music production.
-
Optimize your workflow:
- Develop a consistent and efficient workflow that maximizes your productivity and creativity in the studio.
- Organize your equipment, cables, software presets, and project files for quick access and smooth operation during recording, editing, mixing, and mastering.
-
Experiment and innovate:
- Embrace the flexibility and versatility of a hybrid music studio by combining analogue warmth with digital precision, creative sound design with traditional recording techniques, and experimental approaches with established practices.
- Explore new sounds, textures, and sonic possibilities by blending different tools and technologies in your music production process.
-
Seek guidance and inspiration:
- Connect with other musicians, producers, and engineers who have experience in hybrid music production for advice, collaboration, and inspiration.
- Attend workshops, seminars, and online tutorials to learn new techniques, workflows, and best practices for building and operating a hybrid music studio.
Continuous Learning: Staying Updated And Growth in Your Home Studio Journey
Finally, remember that the setup is just one part of your home studio journey—stay updated with new technologies and techniques through online tutorials, forums , workshops, webinars, etc. The music industry evolves rapidly; keeping abreast will ensure you can adapt to changes in technology that could further enhance your setup over time.
Setting up a home studio is an exciting journey filled with learning and growth opportunities—embrace it! Remember, the goal isn’t just creating sound but crafting experiences through music or audio content for others to enjoy. Happy setting-up!